Posts

Showing posts from 2016

Project S-15: Fender roll

I don't know whether I should do the roll or not. As for the S2000, most of the aftermarket wheels are not ideal because of low offset concave face. Therefore, a fender roll could open the door to a bunch of aftermarket wheels, like RPF1's ET45, the classic ones, etc. Considering I have already lowered the car, and I went to Bill for a fender roll, once for all. This process should better be done by some professionals. The roll should be done gently and not too aggressively, i.e., not too much. Just bend the fender liners upwards and don't make it stuck with the inner side of the fender. It would damage somehow the fender. As for the front, tab relocation is a must and also do it properly is super important for aesthetics reason and for anti-rust. Basically you need to heat it up with a heat gun, and trim the sides of the fender liners, and gradually roll the fender, making the fender liner form a gradual curve. That looks beautiful. Note: Jay said that he could not f

Project S-14: Spring installation check

I went to Billman today for an inspection of my installed Eibach. This post follows the previous lowering spring installation one. He did check all four sides and found that the driver side rear spring was not totally into the perch. It was not installed correctly. After reinstalling the spring, he did the pre-loading once again. However there were still two fingers. I would like to have it settle for some miles and see whether it would be lower a little bit. Note: HOW TO CHECK IF THE SPRINGS ARE IN THE CORRECT POSITION? ------- Use a 1/2 inch open end wrench to fit the coils. The Eibach front should be less than 1/2 thick and the rear should be larger. We check by thickness of the coils. 12/14/16

Project S-13: TCT Replacement

Image
Replaced my TCT at 58222 miles with Billman's TCT. Photo: from Billman 12/14/2016

Project S-12: Winter tires WS-80 with new rims ASA AR1

Image
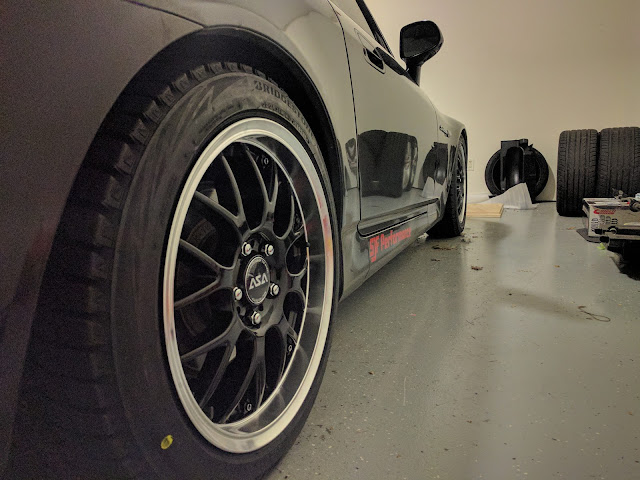
Since winter is coming and it is likely to snow soon, I installed new rims with WS-80 on them this afternoon. NOTE: The all-season NS-20 tires are installed in a wrong way!!! The rear ones are not installed with the correction rotation direction. See above in the pic for details. Need to sway driver side rear and passenger side rear tires! No wonder I find it slippery for no reason in the rain and snow!! 12/10/16

Project S-11: Alignment (UK MOD)

Image
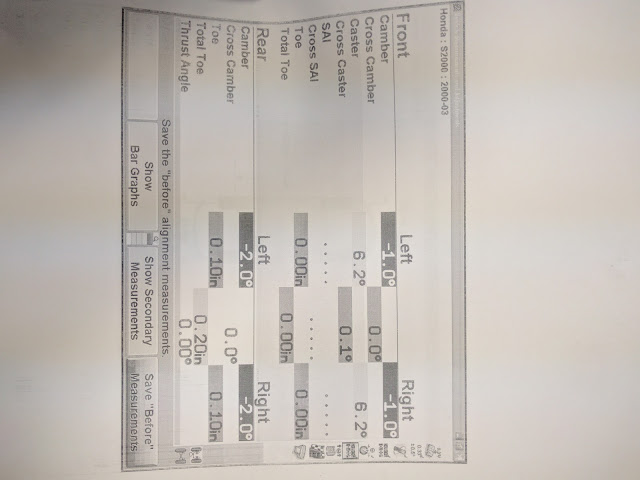
Steve is one of the best guys for the alignment job. He got his HawkEye device and did the job well. It seemed that the toe was way off with front a lot of pos toe and back some neg toe. Camber was so so, where driver and passenger sides were not equal. Caster was perfect. Here was the current setup: (DUE TO SPRING ISSUE, may need to re-align the car early next year) Thanks Steve! (Spring related ride height is still a problem though!!) 12/10/16

Project S-10: Lowering spring installation

Image
I took Tuesday off to head towards SJF for the lowering spring installation. Steve is the most experienced S2000 suspension expert in NJ. There are two lowering springs choices for me, one is the Swift Spec R and the other is Eibach Pro-kit. Since the Swift springs work perfectly with CR shocks and could be an overkill for my OEM ap1 shocks, I pick the Eibach ones, which are said to be also one of the best, and have the most OEM driving and handling of the car. I don't have much picture for the process of the installation but with the spring compressor it is not a hard one. Here are the photos I take before, showing the heights of each side: OEM Springs ride height DF DR PF PR With OEM springs there are plenty of gap between the wheel and the fender. My intention is to lower it 1~1.25 inches. Eibach is said to give me 1 inches drop all around. Installation steps: 1. Jack up car (Use hoist for quicker installation), get the wheels off. 2.

Project S-9: GoPro Mount

Image
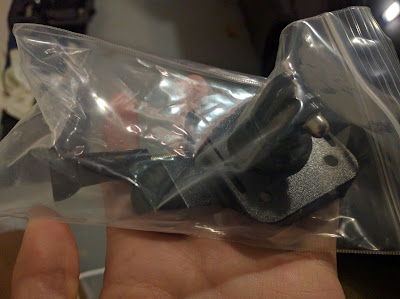
As the Black Friday is coming, I am going to buy a new GoPro for recording my AutoX events as well as snowboarding videos. Correspondingly I bought a GoPro Mount base plate and the head, and I did the installation of the mount on the windshield on my S2000. You can see there are two pieces of the mount, one is the top GoPro head and the other is the base plate. The first thing is to pry out the plastic rubber cap on the screws behind the windshield. It could be time-consuming because you don't wanna ruin the cap so be patient. Next, loosen the screws and get the windshield off. Clean the surroundings. Then what I did was tape the contacting points of the plate of the interior leather head, because I didn't want to mess up the interior too much. Like this: The last step is to screw both the base plate and the windshield to the car. you need to put it precisely on top of the holes and screw one side while keeping it there. Clip on the GoPro head

Project S-8: Clear side markers

Image
The clip on the original amber side marker broke down. It could be hanging there all the time. It's bad for dirt and rain to get in there so I have taped it up for some time. Finally I got some clear side markers and the amber bulbs and installed them today! The overall installation is really simple: 1) Get the bad broken marker off. If the clip is broken, it's already off. My other side marker is good so I used a small screwdriver to get it off from the front end of it. 2) Unscrew the marker counterclockwise and then get the bulb off. Just pull it out. 3) Put on the amber one. 4) Rotate the new clear side marker on. And push it into the slot. Get the clip side in at last because it could clip onto the inside of the car itself. Here is the comparison: It is a 5 minute job! Nice and easy swap! 11/25/16

MSNE AutoX @ Metlife Stadium Lot L - 11/19/16

This was the last event of this year. My third time, not including the first school event! Before riding, I talked with Hez and Kiwi on the setup of the car. They highly recommend I get new tires and do the sway bars. It turned out that my rear sway bar bolt was too rusty. I will let Steve (SJF) to do the work. Also I am planning on doing the alignment by the end of the season, along with a moderate drop, 1~1.25 inches. The options are Eibach or Swift Spec R. So my plan for my project/build would be: 1. Alignment and spring install 2. Drive on my current bad tires. Although the tires are bad, they could help me trigger understeer/oversteer at lower speed, in a much safer environment and give me way more chances to feel and learn to correct the errors. 3. Once I feel comfortable on these, I will start:     a. Disconnect one end of the rear sway bar to feel the difference!     b. Buy new set of wheels and tires (now I am into oz + re71s) 4. Drive! On:     a. Old shitty tires a

Project S-7: Brake fluid and clutch fluid

Image
On this Veterans Day I did my brake fluid and clutch fluid change for the S2000. Tools: - Spline six-point socket - 19mm socket, used along with the above socket - 8mm, 10mm wrench - 8mm, 10mm ratchet when the bolt is overtorqued - ATE SuperBlue - Jack stands - Floor jack - Breaker bar - Clear hose (PVC tubing, 3/8 OD) - Catch pan - Bottle - Turkey baster - Zip tie (optional) I used the wrong socket. I tried 17mm regular socket with the lug nuts and it seemed to fit. So I used the breaker bar to loosen it. It did come off, but the lug nut was stuck with the socket, forever. It was like this: The fluid that I used was ATE SuperBlue or TYP 200. Both are the same, with the first one dyed blue and the second gold. I used the 3-ton Pittsburgh floor jack from HF. It worked pretty well. The first step is to put the car on jack stands. Since I was doing clutch too so I put it on all four jack stands. Next thing you wanna do is to open the caps, use the t

Project S-6: Windshield washer fluid top off

Image
Just a easy job but you should definitely check during normal use. The car has its own Honda washer fluid gauge. You can see it, pull it out and check the level. The reason I went to buy new washer fluid was that I could barely see any mark on the marker/gauge. Therefore I bought Rain-x 2 in 1 all season fluid. However, it turned out that the tank was full when I added only like 1/4 of a gallon. And after that I tried to use the fluid for like 30 secs. It was still blue, which was the remainings in the tank. So I ended up with mixing the previous unknown brand fluid with this brand new one. It doesn't really though. It is always a good idea to keep a bottle of washer fluid at home as you could add some when you find little in the tank. Note that when there's no fluid in the tank and you still try to use the pump it could damage the pump. As for the S2000, the pump and the tank is located behind the fenders. It's not hard to access them if you need to replace

NNJR SCCA AutoX @ Metlife Stadium Lot E - 11/05/16

Image
Last and my first event for this season with NNJ. I did rethink of oversteer and understeer before I ran the course. Also I did walk the course twice, which helped me a lot. I didn't go off course once in the 7 runs. And some of the turns were well prepared, though not fast. I need to keep it habit and look further ahead. Just get used to it. The biggest takeaway from this event was this: Oversteer is the result of excessive or sudden input (whether it's gas or brake). Understeer is the result of some input but with too much speed (or bad front tires). I got 1m2s for the first run. And for the following ones, 1m, 59s, 58s, 57s, 56s and 56s. Literally faster with each run. The good thing is that I am making progress. The bad thing is, although I am getting faster, I haven't pushed the car hard enough. So I would say for the next event I should focus on the following things: (before buying and replacing these with new tires) 0. Smooth input + look ahead 1-a. Push it

Project S-5: Inflate tires

Image
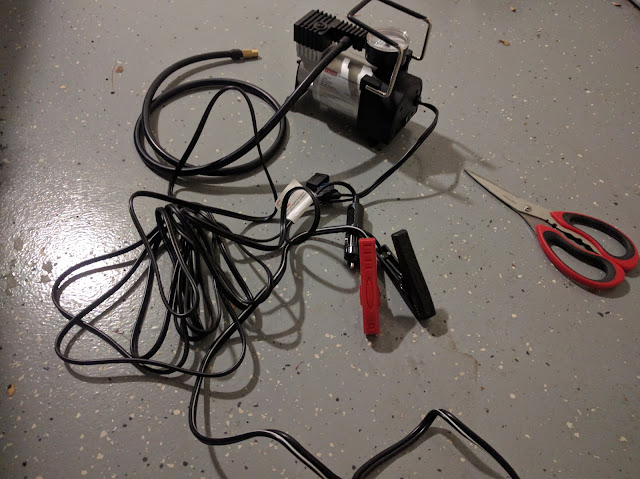
It may sound like a piece of cake. Yes it is. But we should never neglect the importance of inflating tires, especially to proper PSI. Many people don't care about the tire pressure. Some do but don't check quite often. My recommendation would be checking tire pressure at least once a month. I am doing once every other week. The tire pressure should always be greater than 30, in my humble opinion, and be kept below 40. As for the S2000, it's quite simple: 32psi all year round could do you a favor. But it is better if you: - 32psi for summer - 36psi for winter - 36psi for autocross The reason we need some more pressure in the tires when doing autocross is that underinflated tires could lead to huge understeer. I experienced this last weekend, you could see my last Sat AutoX with MSNE post. I didn't mention tire pressure because I had no idea that time. When I got home I found I was running on tires with 27, 27, 27 and 30, which is the rear right one. That was ni

MSNE AutoX @ Metlife Stadium Lot L - 10/29/16

Image
It was so cold. But I still learned a lot in my eight runs. The first run was 1m11s. After that most of them were like 1m08s. My best among the eight was 1m06s. These are the several things that I learned from this AutoX: 1. My car is mostly stock, and the tires are bad. So it is hard for it to make turns. 2. Understeer everywhere in the wide U-turns. I didn't mean to understeer but because of the speed, bad front tires and too much gas during the understeer, I just couldn't make the turn complete. A lot of attempts ended up running off course just because I was not familiar with understeer and when I found that was understeer, I kept my gas a bit hard there! It made no good at all. 3. Still oversteer, although they occurred less this time due to the wide U-turn setup of the course. There were two huge wide turns and some small turns right after them. Most of the oversteer happened when I stomped on the gas pedal of a sudden. Being gentle and aggressive should help. 4.

2016 S2K Fall Bear Mountain Drive

Image
10/23/16 Sunny Sat but a little bit windy and cold. We gathered together 7am at Rockefeller Lookout to the north of Fort Lee and then head out to the gathering. It was quite a nice trip: This route designed was good. At each major turn there would a guy pointing the direction you should go. Thanks to all of them for helping us completing the drive! Also there was no toll station at all during the drive and the roads were awesome! Beautiful sceneries along the road!! Here are the photos and video that I took and made for the drive: And: