Posts

Showing posts from December, 2016

Project S-15: Fender roll

I don't know whether I should do the roll or not. As for the S2000, most of the aftermarket wheels are not ideal because of low offset concave face. Therefore, a fender roll could open the door to a bunch of aftermarket wheels, like RPF1's ET45, the classic ones, etc. Considering I have already lowered the car, and I went to Bill for a fender roll, once for all. This process should better be done by some professionals. The roll should be done gently and not too aggressively, i.e., not too much. Just bend the fender liners upwards and don't make it stuck with the inner side of the fender. It would damage somehow the fender. As for the front, tab relocation is a must and also do it properly is super important for aesthetics reason and for anti-rust. Basically you need to heat it up with a heat gun, and trim the sides of the fender liners, and gradually roll the fender, making the fender liner form a gradual curve. That looks beautiful. Note: Jay said that he could not f
Project S-14: Spring installation check

I went to Billman today for an inspection of my installed Eibach. This post follows the previous lowering spring installation one. He did check all four sides and found that the driver side rear spring was not totally into the perch. It was not installed correctly. After reinstalling the spring, he did the pre-loading once again. However there were still two fingers. I would like to have it settle for some miles and see whether it would be lower a little bit. Note: HOW TO CHECK IF THE SPRINGS ARE IN THE CORRECT POSITION? ------- Use a 1/2 inch open end wrench to fit the coils. The Eibach front should be less than 1/2 thick and the rear should be larger. We check by thickness of the coils. 12/14/16

Project S-13: TCT Replacement

Image
Replaced my TCT at 58222 miles with Billman's TCT. Photo: from Billman 12/14/2016

Project S-12: Winter tires WS-80 with new rims ASA AR1

Image
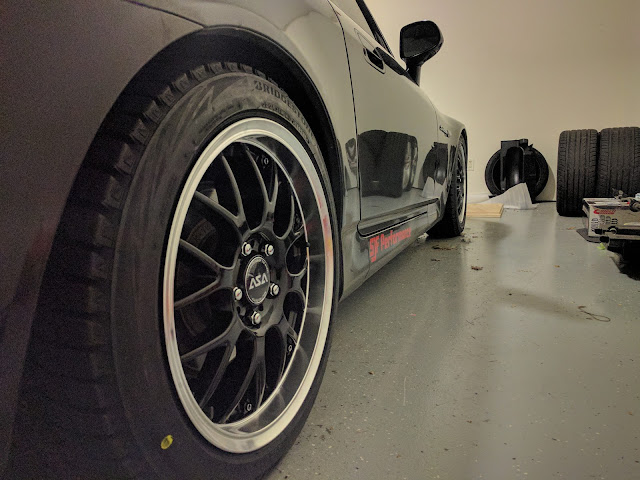
Since winter is coming and it is likely to snow soon, I installed new rims with WS-80 on them this afternoon. NOTE: The all-season NS-20 tires are installed in a wrong way!!! The rear ones are not installed with the correction rotation direction. See above in the pic for details. Need to sway driver side rear and passenger side rear tires! No wonder I find it slippery for no reason in the rain and snow!! 12/10/16

Project S-11: Alignment (UK MOD)

Image
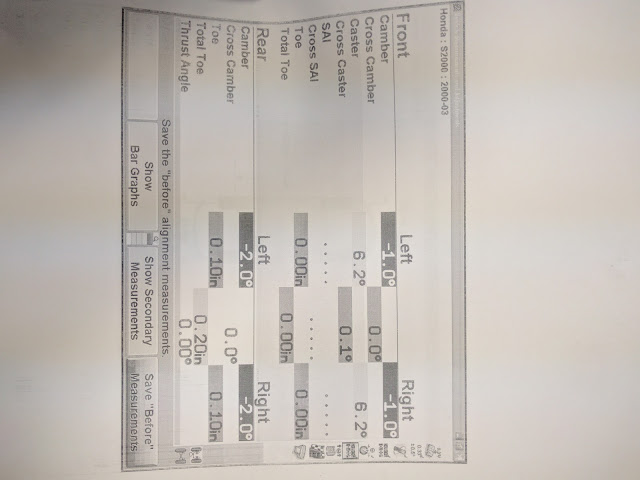
Steve is one of the best guys for the alignment job. He got his HawkEye device and did the job well. It seemed that the toe was way off with front a lot of pos toe and back some neg toe. Camber was so so, where driver and passenger sides were not equal. Caster was perfect. Here was the current setup: (DUE TO SPRING ISSUE, may need to re-align the car early next year) Thanks Steve! (Spring related ride height is still a problem though!!) 12/10/16

Project S-10: Lowering spring installation

Image
I took Tuesday off to head towards SJF for the lowering spring installation. Steve is the most experienced S2000 suspension expert in NJ. There are two lowering springs choices for me, one is the Swift Spec R and the other is Eibach Pro-kit. Since the Swift springs work perfectly with CR shocks and could be an overkill for my OEM ap1 shocks, I pick the Eibach ones, which are said to be also one of the best, and have the most OEM driving and handling of the car. I don't have much picture for the process of the installation but with the spring compressor it is not a hard one. Here are the photos I take before, showing the heights of each side: OEM Springs ride height DF DR PF PR With OEM springs there are plenty of gap between the wheel and the fender. My intention is to lower it 1~1.25 inches. Eibach is said to give me 1 inches drop all around. Installation steps: 1. Jack up car (Use hoist for quicker installation), get the wheels off. 2.

Project S-9: GoPro Mount

Image
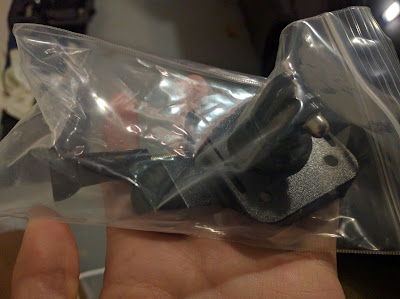
As the Black Friday is coming, I am going to buy a new GoPro for recording my AutoX events as well as snowboarding videos. Correspondingly I bought a GoPro Mount base plate and the head, and I did the installation of the mount on the windshield on my S2000. You can see there are two pieces of the mount, one is the top GoPro head and the other is the base plate. The first thing is to pry out the plastic rubber cap on the screws behind the windshield. It could be time-consuming because you don't wanna ruin the cap so be patient. Next, loosen the screws and get the windshield off. Clean the surroundings. Then what I did was tape the contacting points of the plate of the interior leather head, because I didn't want to mess up the interior too much. Like this: The last step is to screw both the base plate and the windshield to the car. you need to put it precisely on top of the holes and screw one side while keeping it there. Clip on the GoPro head