Posts

Showing posts with the label Project S

Project S-22: Rear diff fluid change
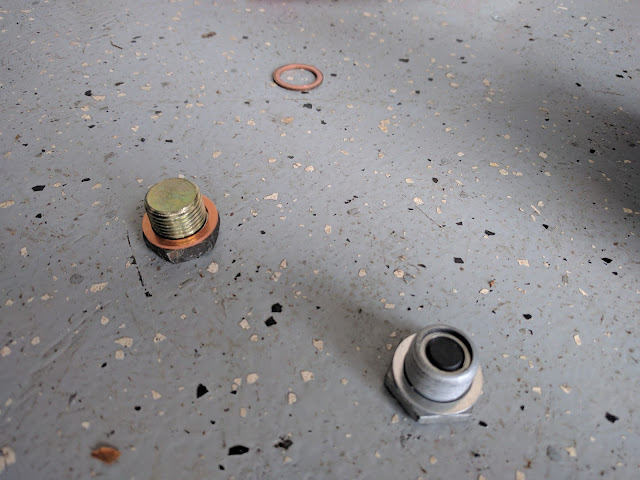
Image
I have waited for a whole winter to do this rear diff fluid change. What was blocking me was the 23mm fill plug on the diff. I used every tool I could find and all my strength. It just didn't come off. I tried once in November last year and once last month. With the craftsman 3/8 inch drive ratchet I just cannot do this.. Then I used a 3/8 inch drive breaker bar along with my 23mm socket to try again. Normally the socket won't fit into the narrow gap there on the side of the diff but the one I bought on Amazon fit quite well inside. Finally on Sat I managed to loosen the fill plug. I felt a sudden movement. It was luckily not breaking the thread. It came off!! The next steps were naive. The 24mm plug on the car was really loose when I got it off. I really ran a change of spilling rear diff fluid everywhere before that! And it was quite dirty.. (not that bad in fact...). I used AMSOIL 75w-110 Severe Gear.  By the pump with hose I pumped 0.7~0.8 quar...

Project S-21: HKS Single Hi-Power Install

Image
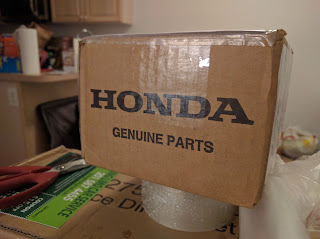
Last thursday Otto and I started working on the installation of this aftermarket exhaust (catback). Okay it was basically him.. I bought this used exhaust from girls2k. Also I bought a gasket from AutoZone and a brand new lower tie bar from Honda OEM parts. We had the parts and tools, but the installation was not easy! First of all taking off the old rear lower tie bar was not that simple. Bolts and nuts were rusted and it was bent. Secondly the pipe was stuck at the cat end.. Moreover the gasket I bought didn't fit on both sides (the pipe and the cat). So... we went to local AutoZone and Advance Auto Parts for another gasket which might be a fit. Well not a single one turned out to be a good one.. What we did was discovering the inventory of gaskets at Advance Auto Parts. We ended up with a most possible one and Otto did the customization based on it. Used drilling tool to add a new hole and in addition to that he cut more around the other two holes to make i...

Project S-20: Fix flat tires

Image
When I went to Steve last time for the alignment, he found that my passenger rear tire was 28psi, way below 32psi I set months ago. I did not drive the car a lot since then so I thought it might be leaking somewhere. I did a search on the tire tread and found this: I was still not sure if it was due to this nail. I used some dish cleaner plus water and sprayed it on the whole tire surface. Only this spot was bubbling! Then I wanted to fix this on my own. I bought the repair kit: A plier and the plug kit! The process was 'easy': first get the nail out, then use the rasp to clean the inner of the hole and then use the plug to put that plastic stuff in! Pull it out rapidly and we are done! Rubber cement could be applied to the rasp and the plug for lubricating and better seal. Well it was not that easy at all. It definitely doesn't need some professional knowledge of the car or parts. Just brute force needed! I literally used all my body weight on t...

Project S-19: 2017 AutoX Alignment

Image
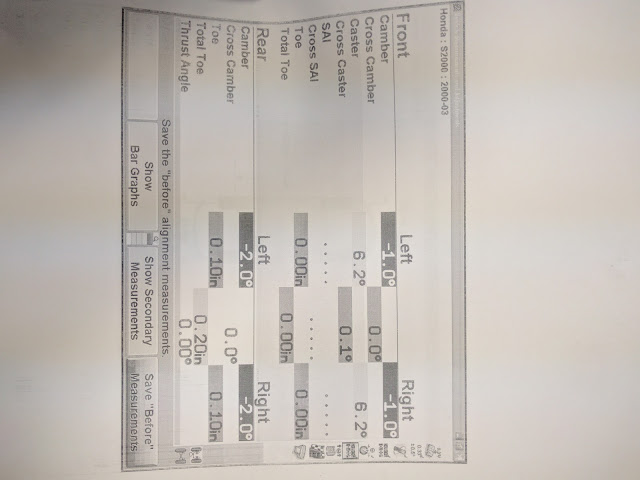
Yes I am doing this once again. It's been only 2700 miles since last alignment. I went to Steve's garage and asked for max front camber, and some less rear camber, plus a little bit of rear toe. Max front camber could help me turn in better, reducing understeer a lot simply because oversteer could be corrected and I am happier with more oversteer than understeer. Check this out: And also note that Steve said the caster couldn't go any higher cuz it's all rusted and can't be moved. In order to adjust it larger I have to order a new set of control arms.. In addition, after looking at the exhaust he said it could be flowmaster exhaust (with US patent on it) and it was almost time to change it. Under high pressure it could crack and break when you are on gas WOT. Can't wait for the season to kick off! 3/8/17

Project S-18: RSG Gears Lip installation

Image
Finally I decided to get my lip installed. I tried to install it myself, but when I put it on it had bad fitment. Adhesive and other tricks needed. After calling Rockstar Garage, I took it to K2 Auto Body for the installation. They said they heated the bumper up to like 150 degrees, flexing both the bumper and the lip. However, it was still pretty hard to fit onto the bumper without some trimming. Since the lip was already painted by RSG, they ended up using some adhesive (like plastic) to hang it on the bumper. Both sides and middle section were applied with this adhesive and held firm there. Also they put two bolts on the bottom tabs on the lip, to the bottom of the bumper.  There is still like 1/4 of a inch gap besides the middle section. It's kinda inevitable though. Here's what the car looks like after the installation: Looks nice so I am good with this hack :) 3/6/17

Project S-17: GoPro external mic mount

Image
I tried the GoPro mount yesterday for the quality. I've used the suction cup mount on the driver side as well as the Modifry mount (http://caterpillarauto.blogspot.com/2016/12/project-s-9-gopro-mount.html). The video quality was so good with the new GoPro Hero 5. However, audio quality was quite the opposite. You could not imagine until you try it yourself. What you can hear mostly is wind noise and the background noise. I've tried to put a GoPro Hero 4 Windslayer on the camera but it barely helped. Since the GoPro Hero 5 has 3 microphone inputs, it could be harder to deal with the camera internal mic input directly. So I wanna record it with an external microphone. After watching dozens of videos on YouTube regarding the AutoX events, Steve's video caught my eye. The audio recorded is very good. So I did some research and asked him. Finally I ended up buying this, Azden SMX-10 stereo microphone. What you also need for the new GoPro Hero 5 is a special external mic a...

Project S-16: Transimission fluid change

Image
It's never too late to write down my project on the S2000. It was last year, 2016's Christmas Eve that I did the transmission fluid change. I don't know the condition of the fluid. There is a simple way to check if the fluid is good. Unscrew the fill bolt and see if the level is high enough and close to the fill hole. Also use a light to check if the fluid is in good shape. Any contaminant or leaf or brick could be a sign of change. What you need for the job is: (1) Transmission fluid you prefer, 2 qtz you need to buy. (1.7 qtz needed for the change though) (2) The 3/8 ratchet (3) The 3/8 torque wrench (4) Two new washers 14mm and 20mm, parts no.  94109-14000, 94109-20000 , one for the fill bolt, one for the drain bolt. As usual, the replacement is recommended. However, do remember to face the sharp side of the washer towards the transmission (car). (5) Lube pump. You need this to pump the fluid into the transmission bay. I mentioned 3/8 drive here because al...

Project S-15: Fender roll

I don't know whether I should do the roll or not. As for the S2000, most of the aftermarket wheels are not ideal because of low offset concave face. Therefore, a fender roll could open the door to a bunch of aftermarket wheels, like RPF1's ET45, the classic ones, etc. Considering I have already lowered the car, and I went to Bill for a fender roll, once for all. This process should better be done by some professionals. The roll should be done gently and not too aggressively, i.e., not too much. Just bend the fender liners upwards and don't make it stuck with the inner side of the fender. It would damage somehow the fender. As for the front, tab relocation is a must and also do it properly is super important for aesthetics reason and for anti-rust. Basically you need to heat it up with a heat gun, and trim the sides of the fender liners, and gradually roll the fender, making the fender liner form a gradual curve. That looks beautiful. Note: Jay said that he could not f...

Project S-14: Spring installation check

I went to Billman today for an inspection of my installed Eibach. This post follows the previous lowering spring installation one. He did check all four sides and found that the driver side rear spring was not totally into the perch. It was not installed correctly. After reinstalling the spring, he did the pre-loading once again. However there were still two fingers. I would like to have it settle for some miles and see whether it would be lower a little bit. Note: HOW TO CHECK IF THE SPRINGS ARE IN THE CORRECT POSITION? ------- Use a 1/2 inch open end wrench to fit the coils. The Eibach front should be less than 1/2 thick and the rear should be larger. We check by thickness of the coils. 12/14/16

Project S-13: TCT Replacement

Image
Replaced my TCT at 58222 miles with Billman's TCT. Photo: from Billman 12/14/2016

Project S-12: Winter tires WS-80 with new rims ASA AR1

Image
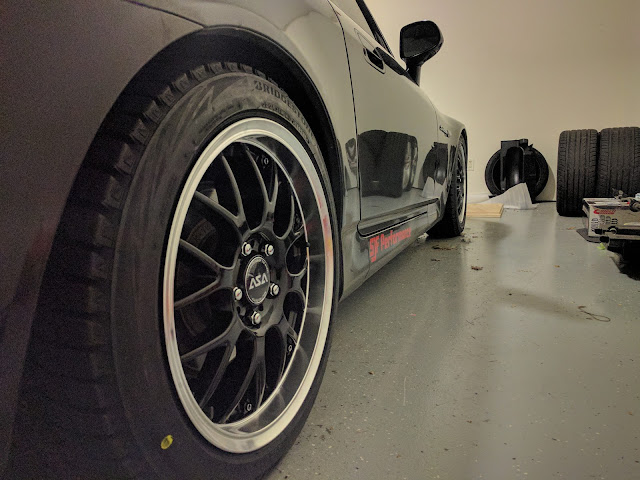
Since winter is coming and it is likely to snow soon, I installed new rims with WS-80 on them this afternoon. NOTE: The all-season NS-20 tires are installed in a wrong way!!! The rear ones are not installed with the correction rotation direction. See above in the pic for details. Need to sway driver side rear and passenger side rear tires! No wonder I find it slippery for no reason in the rain and snow!! 12/10/16

Project S-11: Alignment (UK MOD)

Image
Steve is one of the best guys for the alignment job. He got his HawkEye device and did the job well. It seemed that the toe was way off with front a lot of pos toe and back some neg toe. Camber was so so, where driver and passenger sides were not equal. Caster was perfect. Here was the current setup: (DUE TO SPRING ISSUE, may need to re-align the car early next year) Thanks Steve! (Spring related ride height is still a problem though!!) 12/10/16

Project S-10: Lowering spring installation

Image
I took Tuesday off to head towards SJF for the lowering spring installation. Steve is the most experienced S2000 suspension expert in NJ. There are two lowering springs choices for me, one is the Swift Spec R and the other is Eibach Pro-kit. Since the Swift springs work perfectly with CR shocks and could be an overkill for my OEM ap1 shocks, I pick the Eibach ones, which are said to be also one of the best, and have the most OEM driving and handling of the car. I don't have much picture for the process of the installation but with the spring compressor it is not a hard one. Here are the photos I take before, showing the heights of each side: OEM Springs ride height DF DR PF PR With OEM springs there are plenty of gap between the wheel and the fender. My intention is to lower it 1~1.25 inches. Eibach is said to give me 1 inches drop all around. Installation steps: 1. Jack up car (Use hoist for quicker installation), get the wheels off. 2. ...

Project S-9: GoPro Mount

Image
As the Black Friday is coming, I am going to buy a new GoPro for recording my AutoX events as well as snowboarding videos. Correspondingly I bought a GoPro Mount base plate and the head, and I did the installation of the mount on the windshield on my S2000. You can see there are two pieces of the mount, one is the top GoPro head and the other is the base plate. The first thing is to pry out the plastic rubber cap on the screws behind the windshield. It could be time-consuming because you don't wanna ruin the cap so be patient. Next, loosen the screws and get the windshield off. Clean the surroundings. Then what I did was tape the contacting points of the plate of the interior leather head, because I didn't want to mess up the interior too much. Like this: The last step is to screw both the base plate and the windshield to the car. you need to put it precisely on top of the holes and screw one side while keeping it there. Clip on the GoPro head...

Project S-8: Clear side markers

Image
The clip on the original amber side marker broke down. It could be hanging there all the time. It's bad for dirt and rain to get in there so I have taped it up for some time. Finally I got some clear side markers and the amber bulbs and installed them today! The overall installation is really simple: 1) Get the bad broken marker off. If the clip is broken, it's already off. My other side marker is good so I used a small screwdriver to get it off from the front end of it. 2) Unscrew the marker counterclockwise and then get the bulb off. Just pull it out. 3) Put on the amber one. 4) Rotate the new clear side marker on. And push it into the slot. Get the clip side in at last because it could clip onto the inside of the car itself. Here is the comparison: It is a 5 minute job! Nice and easy swap! 11/25/16