Posts

Showing posts from November, 2016

Project S-8: Clear side markers
Image
The clip on the original amber side marker broke down. It could be hanging there all the time. It's bad for dirt and rain to get in there so I have taped it up for some time. Finally I got some clear side markers and the amber bulbs and installed them today! The overall installation is really simple: 1) Get the bad broken marker off. If the clip is broken, it's already off. My other side marker is good so I used a small screwdriver to get it off from the front end of it. 2) Unscrew the marker counterclockwise and then get the bulb off. Just pull it out. 3) Put on the amber one. 4) Rotate the new clear side marker on. And push it into the slot. Get the clip side in at last because it could clip onto the inside of the car itself. Here is the comparison: It is a 5 minute job! Nice and easy swap! 11/25/16

MSNE AutoX @ Metlife Stadium Lot L - 11/19/16

This was the last event of this year. My third time, not including the first school event! Before riding, I talked with Hez and Kiwi on the setup of the car. They highly recommend I get new tires and do the sway bars. It turned out that my rear sway bar bolt was too rusty. I will let Steve (SJF) to do the work. Also I am planning on doing the alignment by the end of the season, along with a moderate drop, 1~1.25 inches. The options are Eibach or Swift Spec R. So my plan for my project/build would be: 1. Alignment and spring install 2. Drive on my current bad tires. Although the tires are bad, they could help me trigger understeer/oversteer at lower speed, in a much safer environment and give me way more chances to feel and learn to correct the errors. 3. Once I feel comfortable on these, I will start:     a. Disconnect one end of the rear sway bar to feel the difference!     b. Buy new set of wheels and tires (now I am into oz + re71s) 4. Drive! On:  ...

Project S-7: Brake fluid and clutch fluid

Image
On this Veterans Day I did my brake fluid and clutch fluid change for the S2000. Tools: - Spline six-point socket - 19mm socket, used along with the above socket - 8mm, 10mm wrench - 8mm, 10mm ratchet when the bolt is overtorqued - ATE SuperBlue - Jack stands - Floor jack - Breaker bar - Clear hose (PVC tubing, 3/8 OD) - Catch pan - Bottle - Turkey baster - Zip tie (optional) I used the wrong socket. I tried 17mm regular socket with the lug nuts and it seemed to fit. So I used the breaker bar to loosen it. It did come off, but the lug nut was stuck with the socket, forever. It was like this: The fluid that I used was ATE SuperBlue or TYP 200. Both are the same, with the first one dyed blue and the second gold. I used the 3-ton Pittsburgh floor jack from HF. It worked pretty well. The first step is to put the car on jack stands. Since I was doing clutch too so I put it on all four jack stands. Next thing you wanna do is to open the caps, use the t...

Project S-6: Windshield washer fluid top off

Image
Just a easy job but you should definitely check during normal use. The car has its own Honda washer fluid gauge. You can see it, pull it out and check the level. The reason I went to buy new washer fluid was that I could barely see any mark on the marker/gauge. Therefore I bought Rain-x 2 in 1 all season fluid. However, it turned out that the tank was full when I added only like 1/4 of a gallon. And after that I tried to use the fluid for like 30 secs. It was still blue, which was the remainings in the tank. So I ended up with mixing the previous unknown brand fluid with this brand new one. It doesn't really though. It is always a good idea to keep a bottle of washer fluid at home as you could add some when you find little in the tank. Note that when there's no fluid in the tank and you still try to use the pump it could damage the pump. As for the S2000, the pump and the tank is located behind the fenders. It's not hard to access them if you need to replace...

NNJR SCCA AutoX @ Metlife Stadium Lot E - 11/05/16

Image
Last and my first event for this season with NNJ. I did rethink of oversteer and understeer before I ran the course. Also I did walk the course twice, which helped me a lot. I didn't go off course once in the 7 runs. And some of the turns were well prepared, though not fast. I need to keep it habit and look further ahead. Just get used to it. The biggest takeaway from this event was this: Oversteer is the result of excessive or sudden input (whether it's gas or brake). Understeer is the result of some input but with too much speed (or bad front tires). I got 1m2s for the first run. And for the following ones, 1m, 59s, 58s, 57s, 56s and 56s. Literally faster with each run. The good thing is that I am making progress. The bad thing is, although I am getting faster, I haven't pushed the car hard enough. So I would say for the next event I should focus on the following things: (before buying and replacing these with new tires) 0. Smooth input + look ahead 1-a. Push it...

Project S-5: Inflate tires

Image
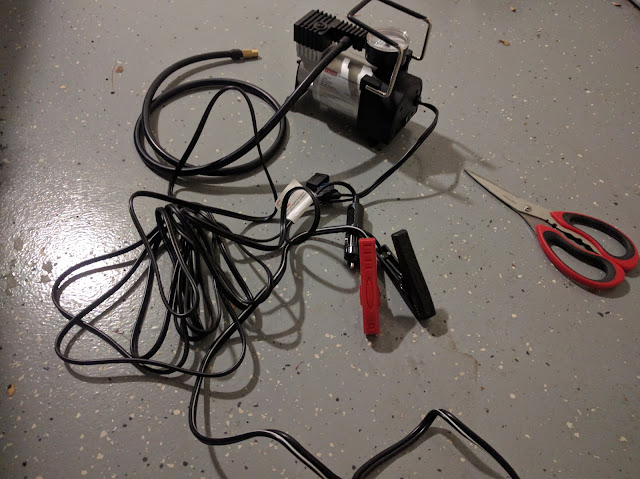
It may sound like a piece of cake. Yes it is. But we should never neglect the importance of inflating tires, especially to proper PSI. Many people don't care about the tire pressure. Some do but don't check quite often. My recommendation would be checking tire pressure at least once a month. I am doing once every other week. The tire pressure should always be greater than 30, in my humble opinion, and be kept below 40. As for the S2000, it's quite simple: 32psi all year round could do you a favor. But it is better if you: - 32psi for summer - 36psi for winter - 36psi for autocross The reason we need some more pressure in the tires when doing autocross is that underinflated tires could lead to huge understeer. I experienced this last weekend, you could see my last Sat AutoX with MSNE post. I didn't mention tire pressure because I had no idea that time. When I got home I found I was running on tires with 27, 27, 27 and 30, which is the rear right one. That was ni...